A Section Shells & Stride
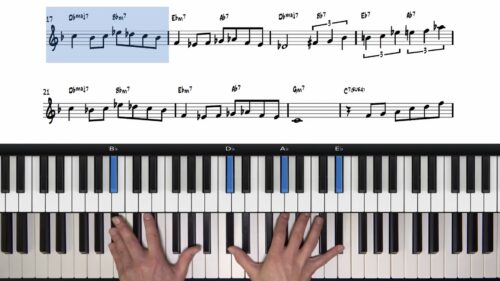
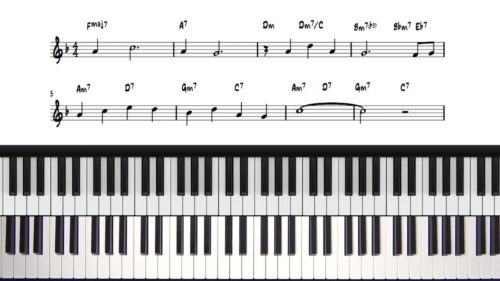
In the previous module we covered a number of drills and exercises to improve our confidence with left hand stride. We will now introduce the melody in our right hand and explore some different techniques for outlining the harmony in our left hand.
Create A Varied Accompaniment
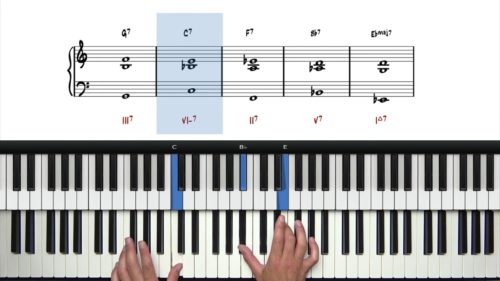
When we are playing in a stride style we don’t have to exclusively stick to the stride left-hand pattern. Whilst the stride creates the foundation of our left hand accompaniment, we can also introduce other types of voicings such as left hand shell voicings and two-handed spread voicings.
Melodic & Harmonic Considerations
The stride left hand pattern is particularly effective when we have a single chord in the measure and/or space in the melody. In this case the stride left hand adds rhythmic and harmonic interest. Conversely, when we have a busy melody line and/or multiple chord changes per measure, we can opt for other voicing techniques such as shell and spread voicings.
Lesson Downloads
-
A Section Melody, Shells, Stride File Type: pdf
Practice Tips
-
Intertwine the stride left hand pattern with occasional shell and spread voicings to create a more varied accompaniment and arrangement.
-
Always keep in mind the melody and the harmony which can help you to determine the most suitable choice of voicing structure in your left hand.
-
Outline the quarter beat with your left hand when playing spread and shell voicings to help create a steady pulse as you play through the tune.


Excellent lesson. Well explained. Exactly what I was looking for.
Any tips for annotating the score? It’s hard to remember all the decisions one makes so useful to record it on the score. How do you do this efficiently?
Hi Mavis,
I’m glad that you enjoyed the lesson.
Yes for annotating the score I recommend to use a pencil – preferably a sharp one so that the annotations don’t take up too much space.
Pencil is better because we can erase/update our annotations if we want to.
When I was starting out with lead sheets I would write notes outlining the 251s, the 36251s etc… so that I’m giving myself a visual prompt each time I read the chord chart.
As you progress onto the next lessons in this course you can continue to annotate the lead sheet with things like passing chords, perhaps the extensions being used (9s, 11s, 13s) and in particular over dominant chords the alterations being used such as b9s, #9s, #11s, b13s etc…
I have attached an example of my annotated lead sheet that I shared of the chord chart for “Pure Imagination” – see below. If you check out this seminar in the 6th chapter “Creating Fills and Arranging Tunes” I provide some more insights and guidance: https://www.pianogroove.com/live-seminars/beginner-jazz-qa-session/ – you can download a PDF of this annotated score in the Seminar Resources of that page. Click the “See All Seminar Resources” button in the bottom right hand corner of the page.
When I was starting out with jazz piano I would always annotate my lead sheets in this way, and naturally the score would get messy and a little tattered after time working on it and scribbling my notes on it, and so periodically I would take a new clean copy of the score and write on my annotations to keep everything tidy and legible.
I would store all of these annotated lead sheets in a plastic wallet folder. I found that recording the details and nuances of my arrangements in ‘lead sheet shorthand’ is much better than relying on transcriptions.
Remember that we are learning these tunes for all of our lives, and so in a few weeks, months, or even years, you will find some new theory topics and ideas that you can apply to this tune, and so then you can revise or add to your annotated lead sheet. My own arrangements are always a ‘work in progress’!
I hope that helps Mavis, check out the seminar chapter that I reference above and let me know if you have any other questions.
Talk soon, Hayden